Setup
⚙️ Setup and Configuration - Crafter.ai This guide delves into all the configuration options available in the Setup step, to create chatbots perfectly tail...
⚙️ Setup and Configuration - Crafter.ai
This guide delves into all the configuration options available in the Setup step, to create chatbots perfectly tailored to your needs.
🎯 Overview of the Setup Step
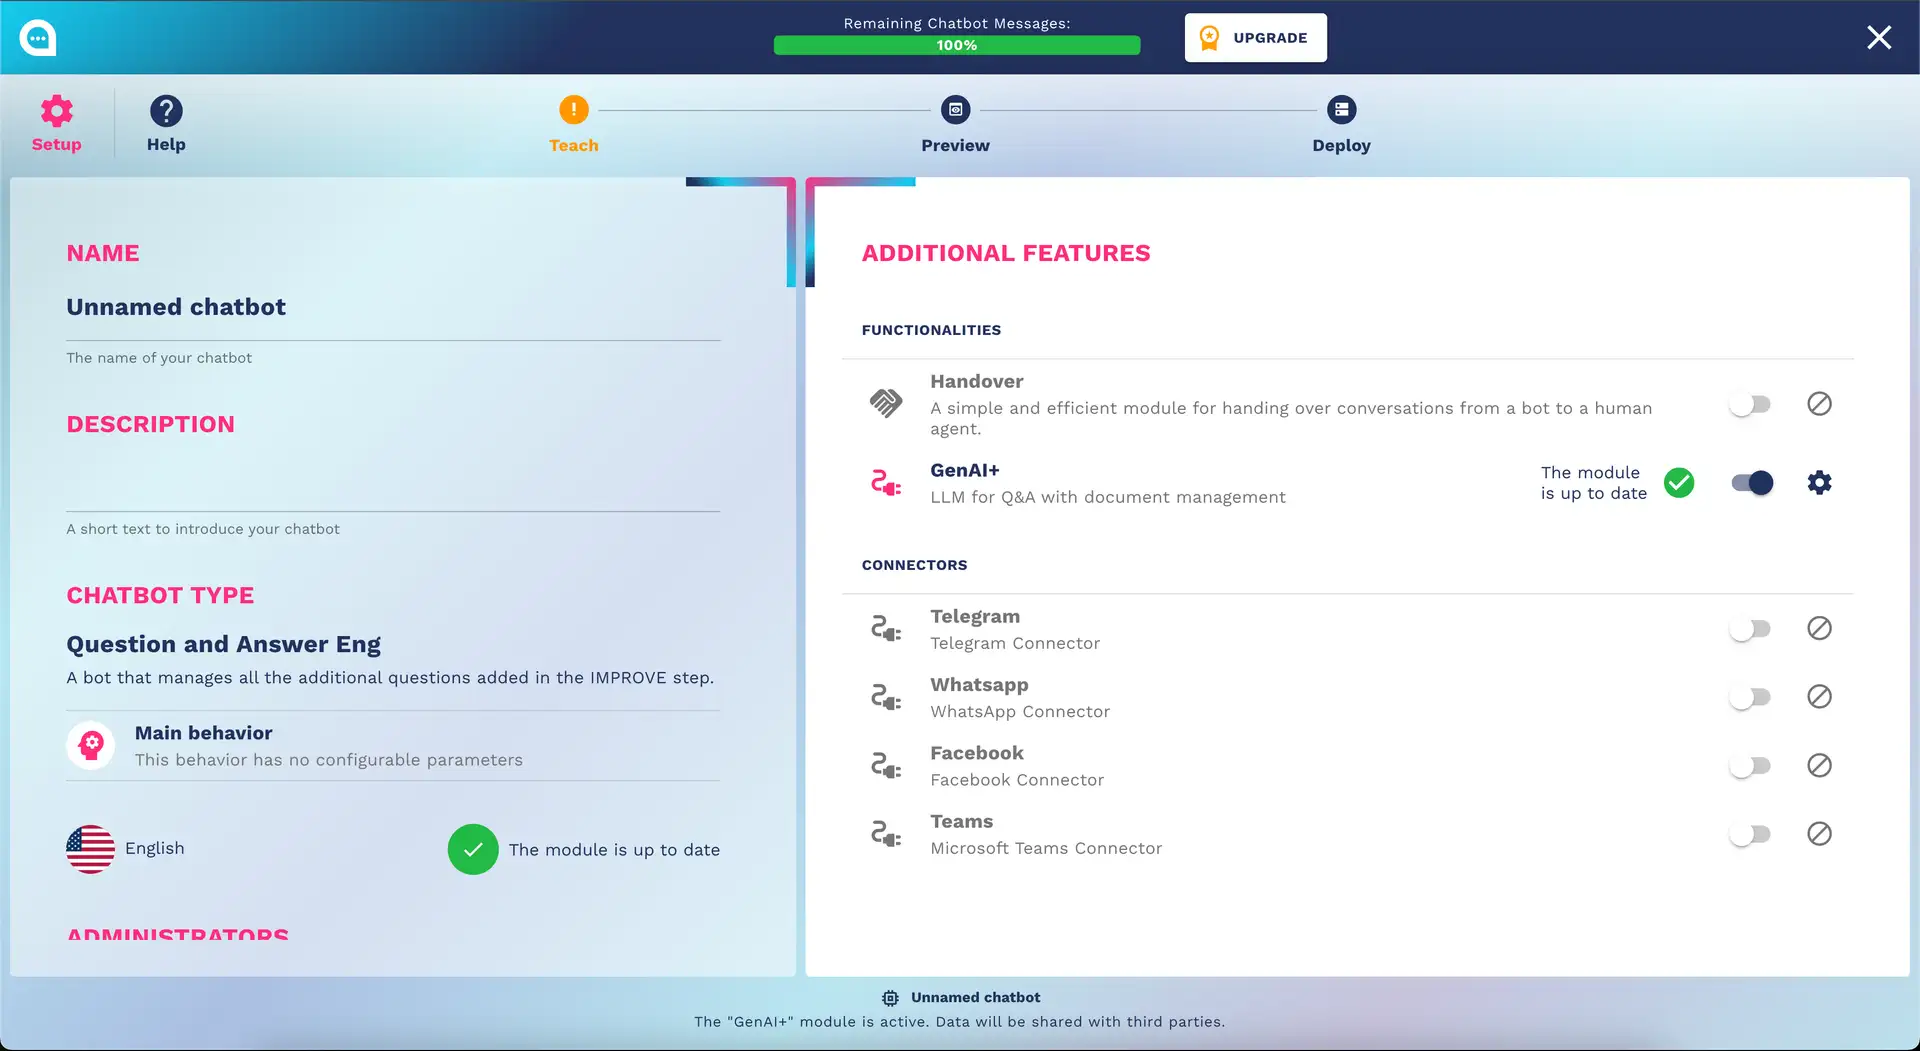
The Setup step is the foundation of your chatbot. Here you define:
- Chatbot Identity (name, description, language)
- Type and main behavior
- Additional features and modules
- Team management and permissions
🤖 Basic Chatbot Configuration
Fundamental Information
Chatbot Name
- Required field
- This name will NOT appear in the chat title
- Best Practice:
- Use friendly and recognizable names ("Assistant Marco", "Sales Helper")
- Avoid overly long names (max 20 characters)
- Reflect the brand or the bot's function
Description
- Optional but recommended
- Brief introductory text (max 150 characters)
- Will appear on the dashboard and can be shown to users
- Examples:
- "I help you find the perfect product for you"
- "24/7 technical support for our customers"
- "Book appointments and get information about services"
Chatbot Language
Supported languages:
- 🇮🇹 Italian
- 🇬🇧 English
- 🇧🇷 Portuguese (Brazil)
- 🇪🇸 Spanish
- 🇫🇷 French
- 🇩🇪 German
⚠️ Important: The language influences:
- Natural language understanding
- Default system messages
- Date and number formatting
🔧 Additional Features (Modules)
Handover to Human
When to use it: When human support is needed for complex cases
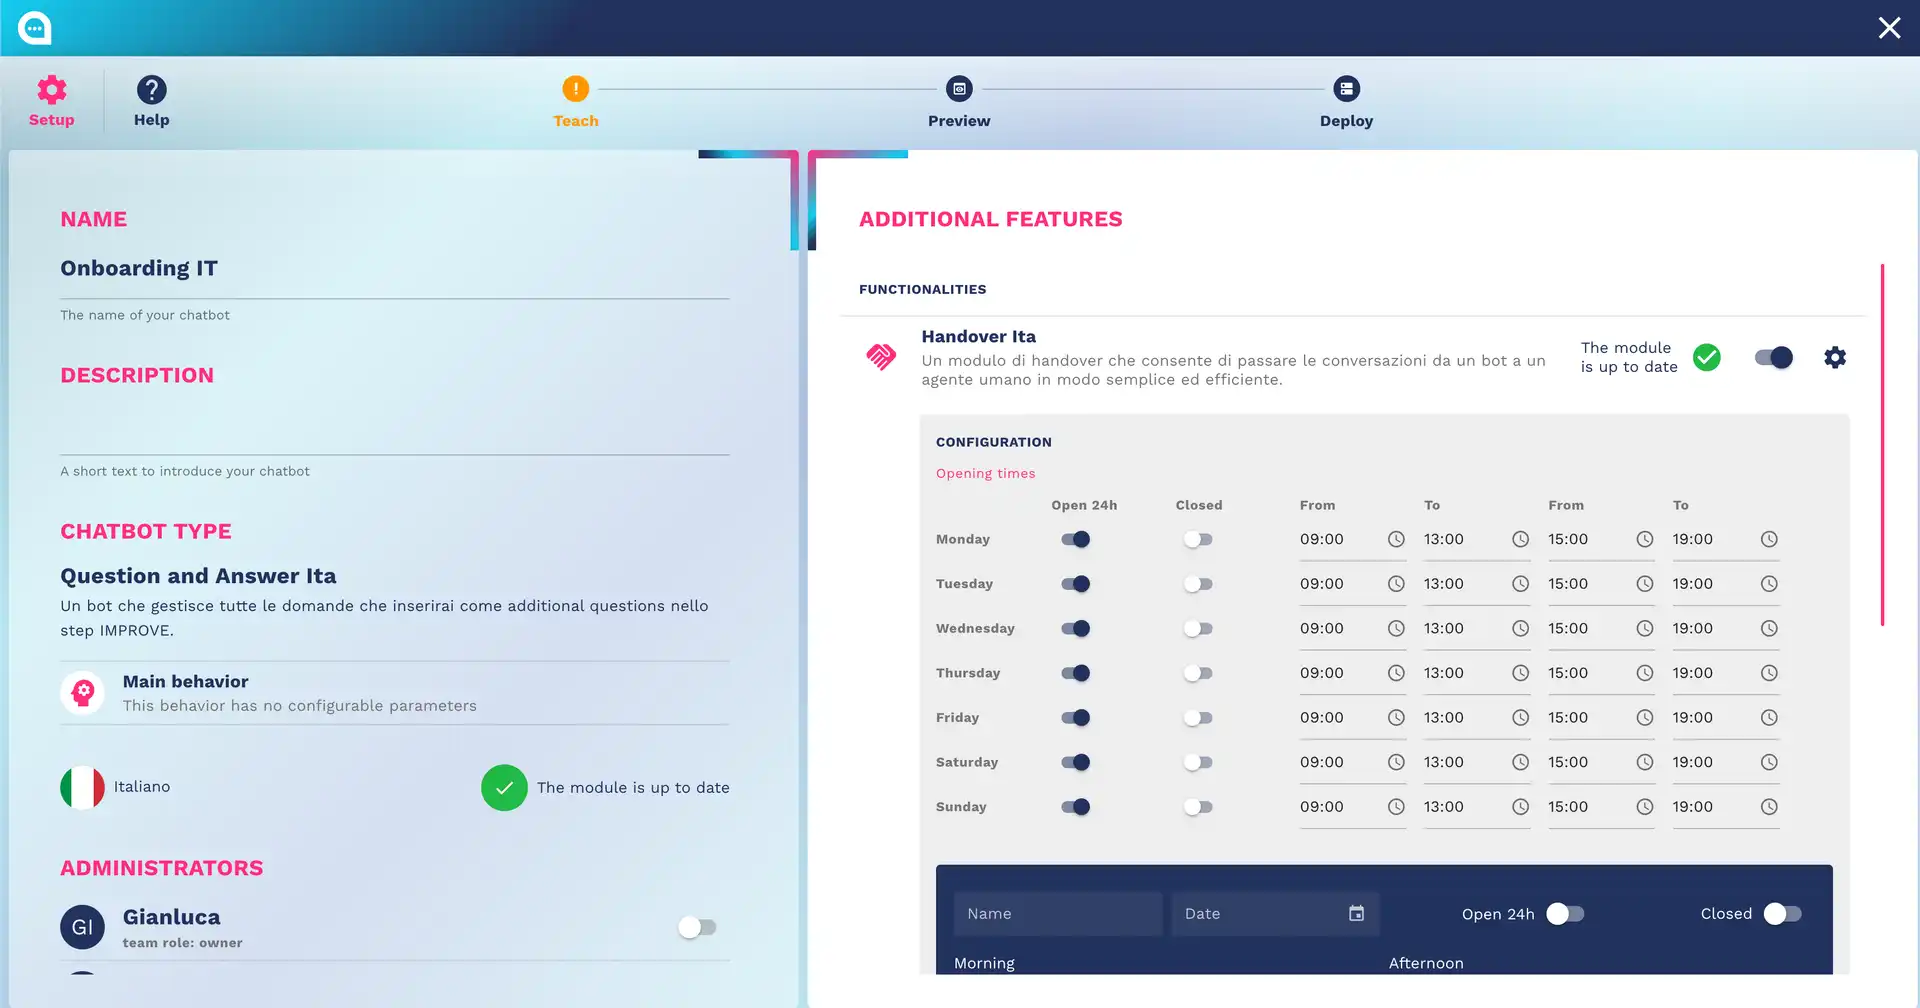
Configuration:
- Operator Hours: Define when operators are available
- Handover Message: Customize the transfer message
- Automatic Triggers: Set when to activate the transfer
- Queue Management: Manage waiting queues
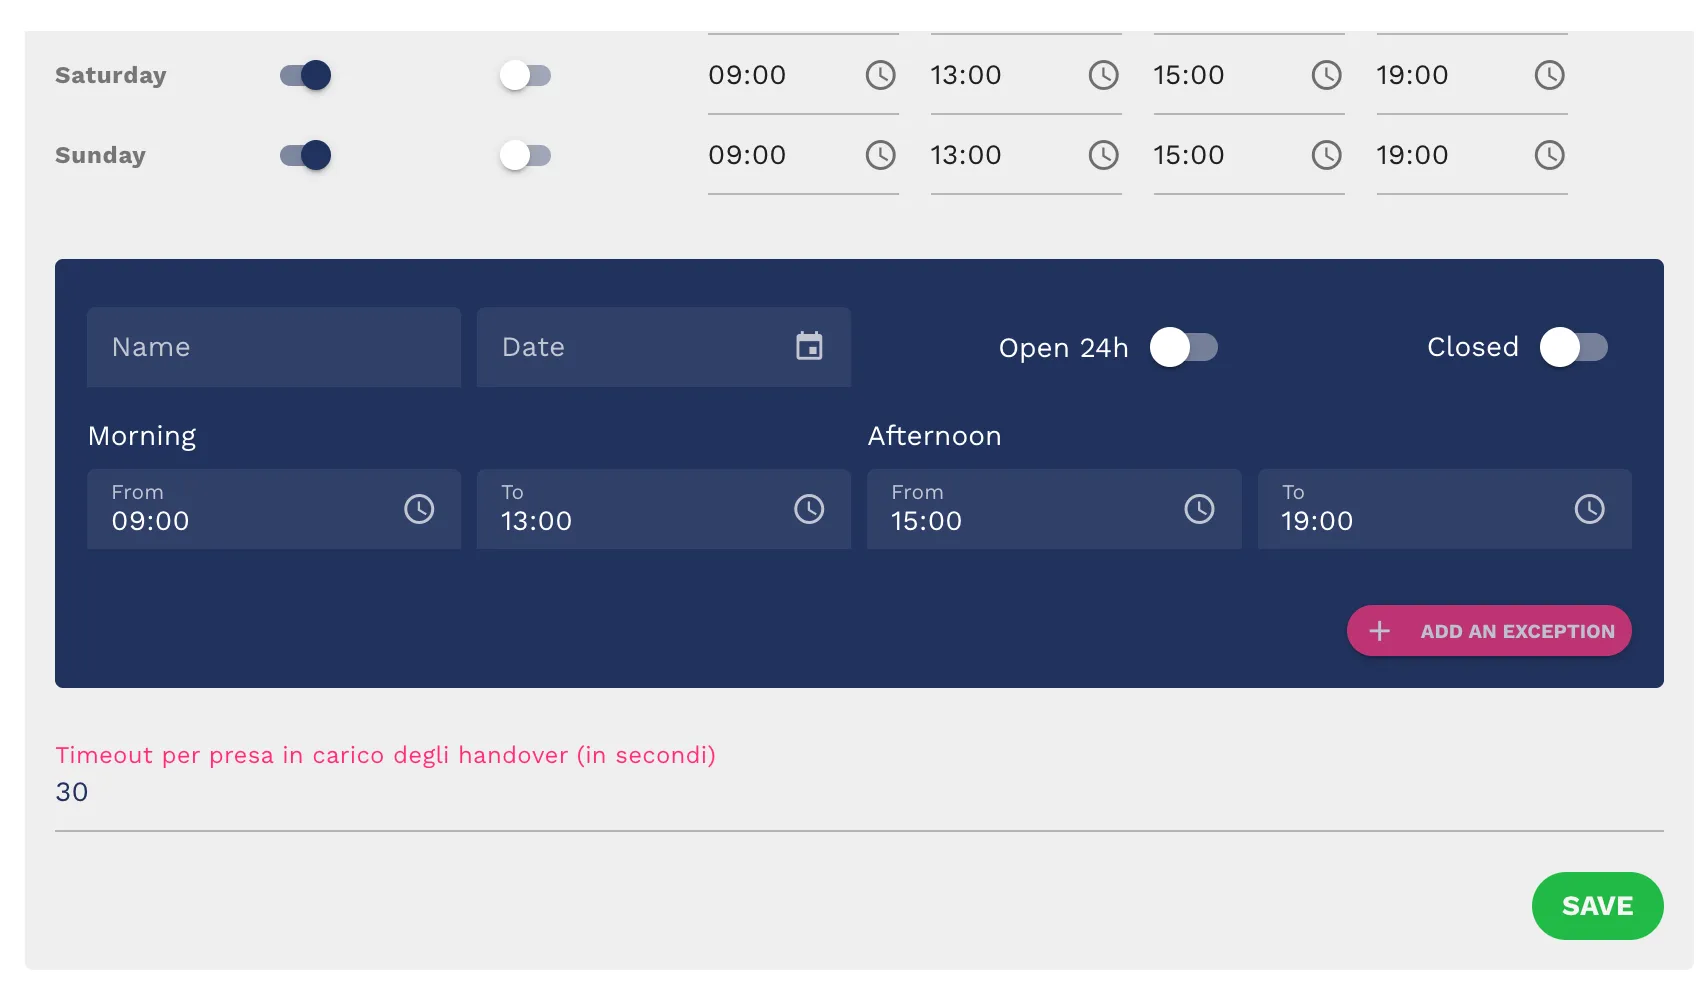
Hours Configuration:
Monday - Friday: 09:00 - 18:00
Saturday: 09:00 - 13:00
Sunday: Closed

Holidays: Configurable in the calendar
Handover Triggers:
- Specific keywords ("I want to talk to an operator")
- After N messages without resolution
- For specific topics (complaints, refunds)
- Low confidence score
Lead Collection
When to use it: To collect contact information
Configurable Fields:
- Name (required/optional)
- Email (with validation)
- Phone (with automatic formatting)
- Company
- Industry
- Additional notes
Collection Triggers:
- After specific response
- After N messages
- Before providing confidential information
- Upon explicit request
Privacy Configuration:
- GDPR consent checkbox
- Privacy policy link
- Newsletter opt-in
- Data retention period
Calendar Integration (only enterprise plan)
When to use it: For booking appointments and consultations
Supported Integrations:
- Google Calendar
- Outlook/Exchange
- Calendly
- Custom API
Configuration:
- Available Hours: Define bookable slots
- Appointment Duration: Standard or variable
- Buffer Time: Time between appointments
- Booking Limits: Min/max days in advance
Booking Workflow:
- User requests an appointment
- Bot shows availability calendar
- User selects date/time
- Bot collects necessary data
- Confirmation and calendar invite sent
Knowledge Base Enhancement
When to use it: For chatbots with a lot of information to manage
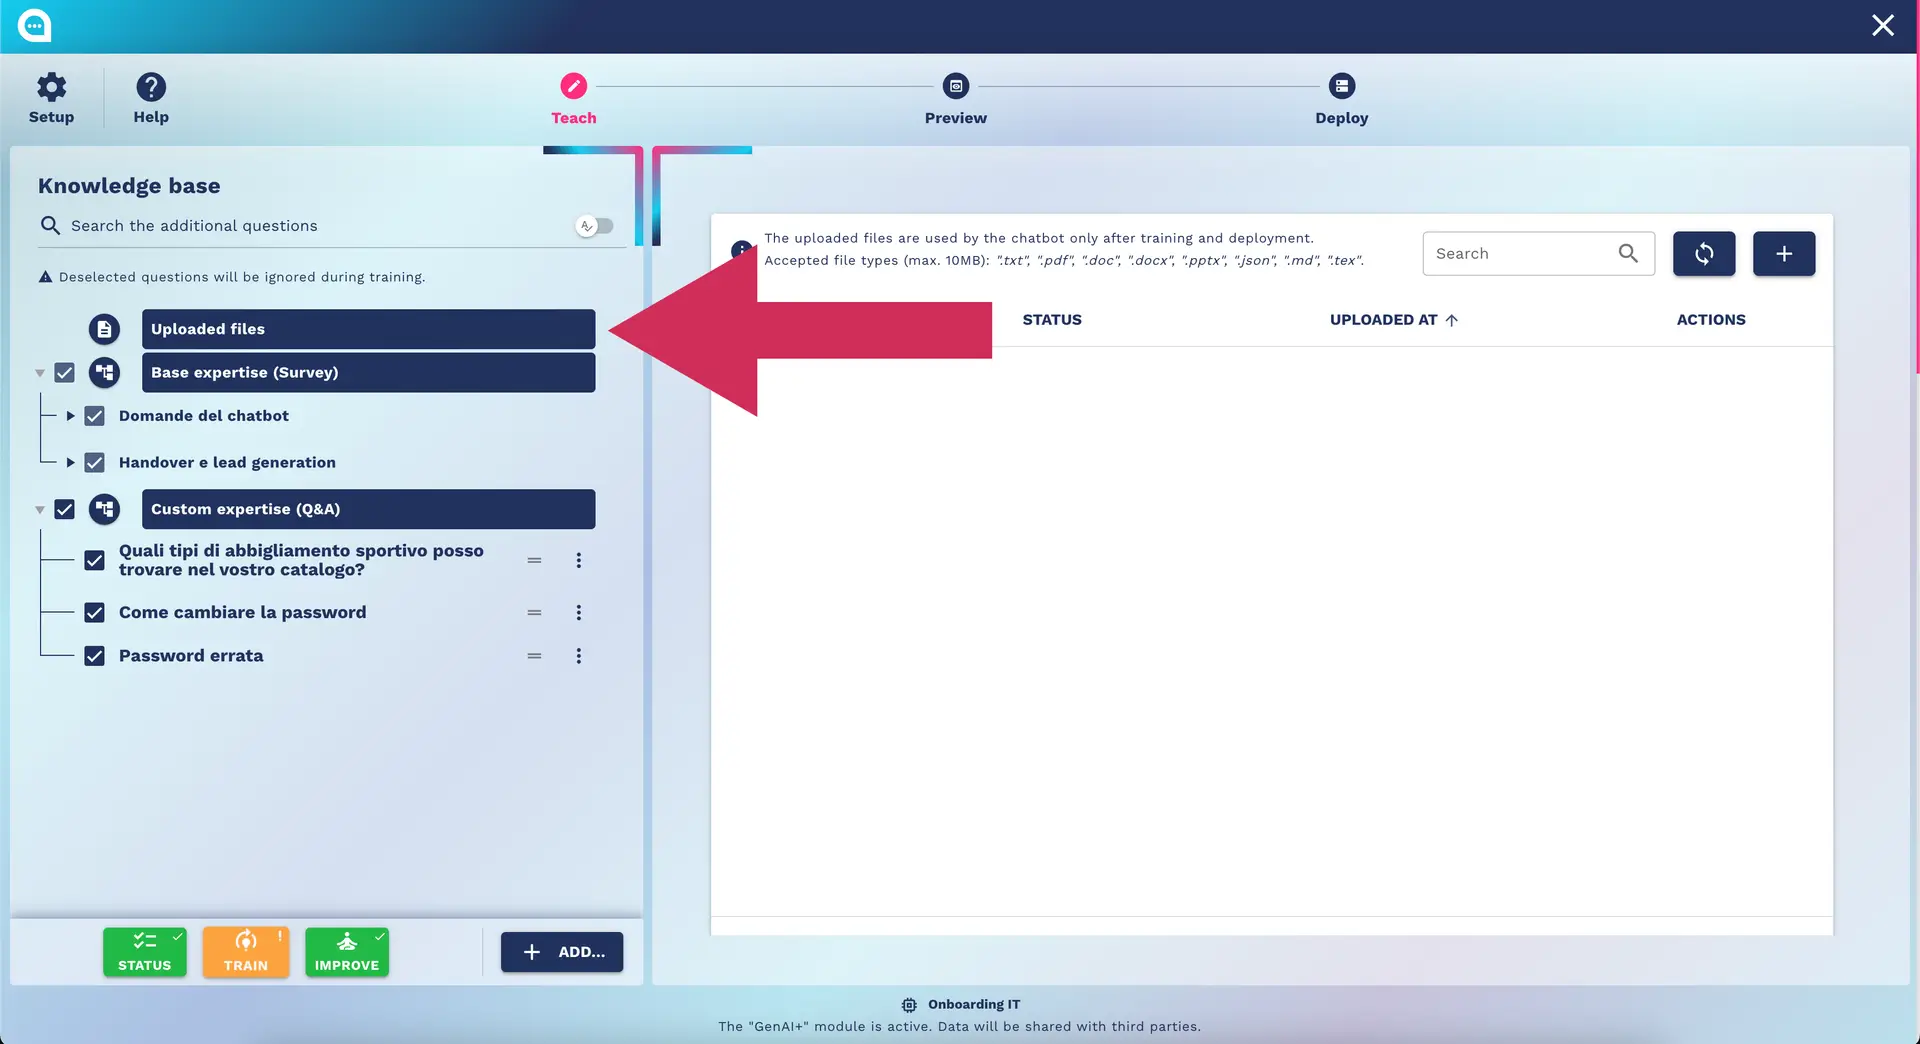
Features:
- Upload Documents: PDF, DOCX, TXT
- Web Scraping: Import content from websites
- Database Integration: Connection to existing DBs
- Auto-Update: Automatic content updates
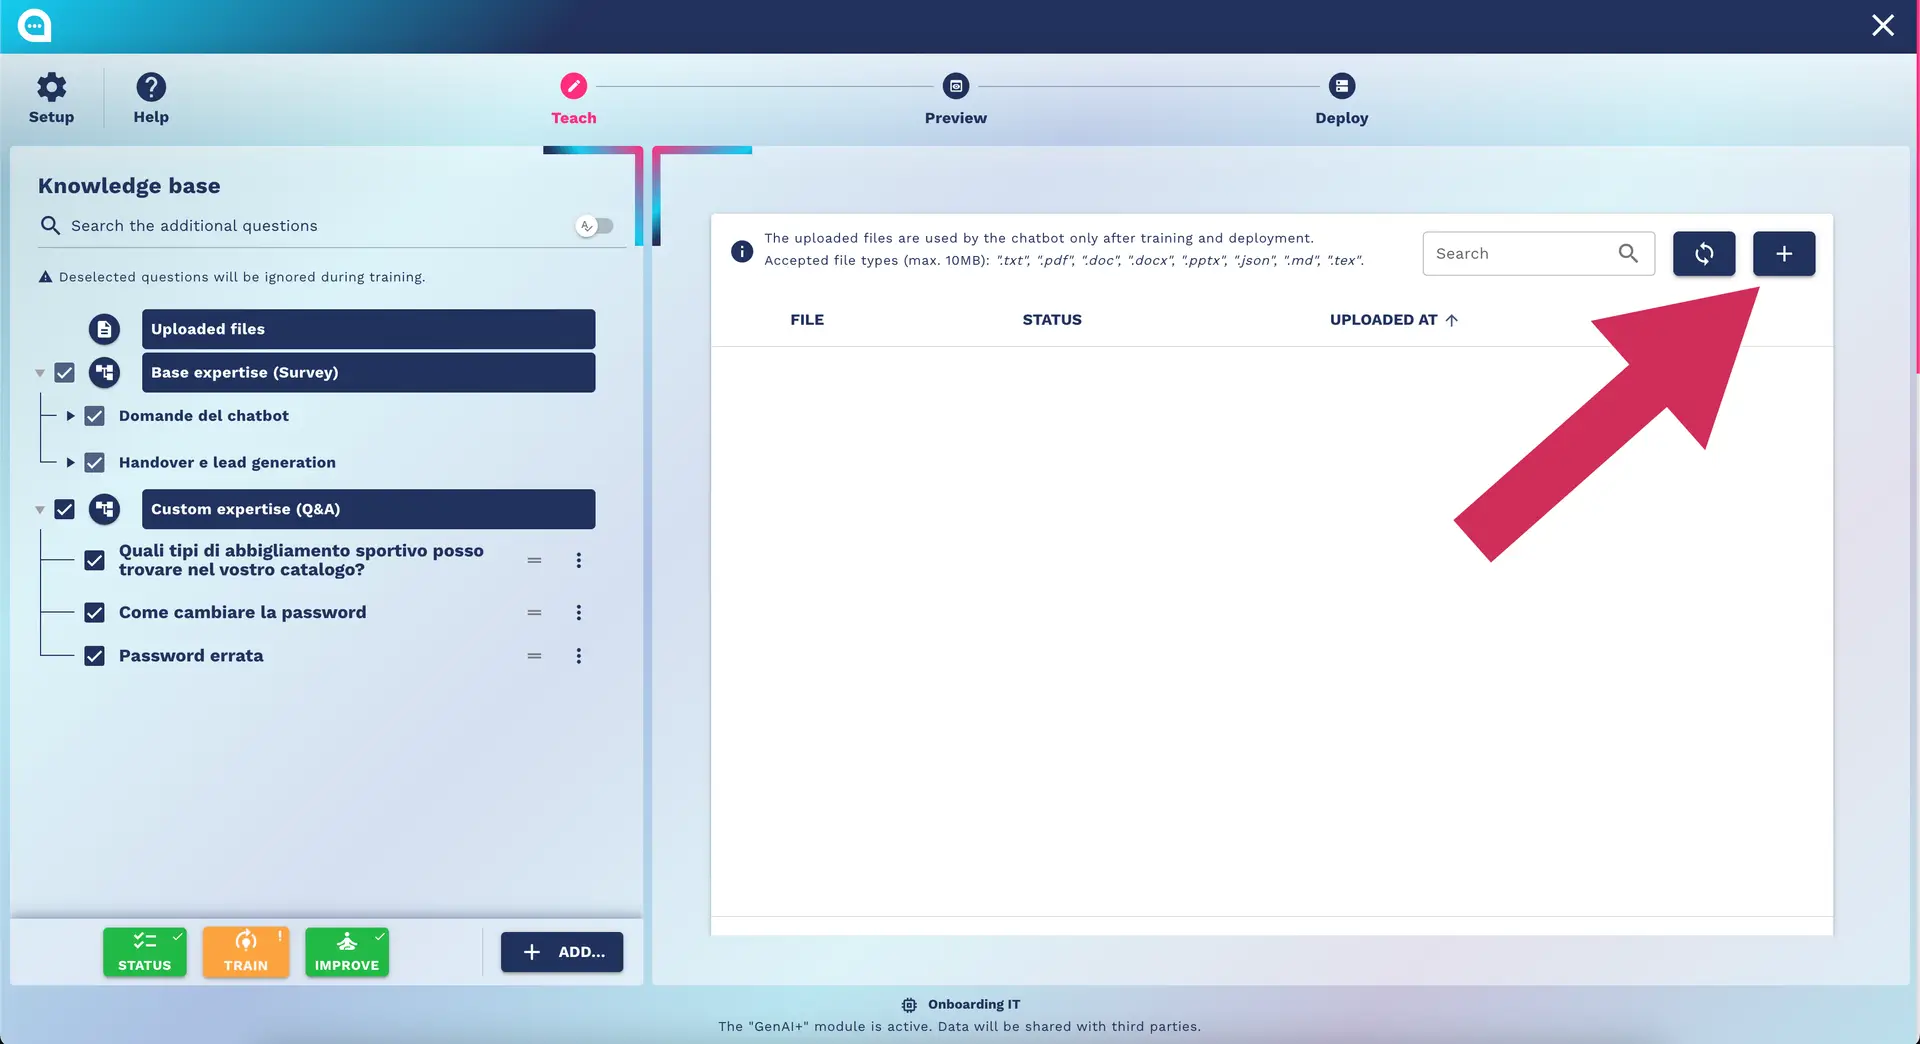
Supported Formats:
- 📄 PDF: Up to 50MB per file
- 📝 DOCX/DOC: With formatting
- 📊 Excel/CSV: For structured data
- 🌐 HTML/TXT: Plain text
- 🔗 URLs: Automatic scraping
Analytics & Reporting
When to use it: To monitor performance and optimize
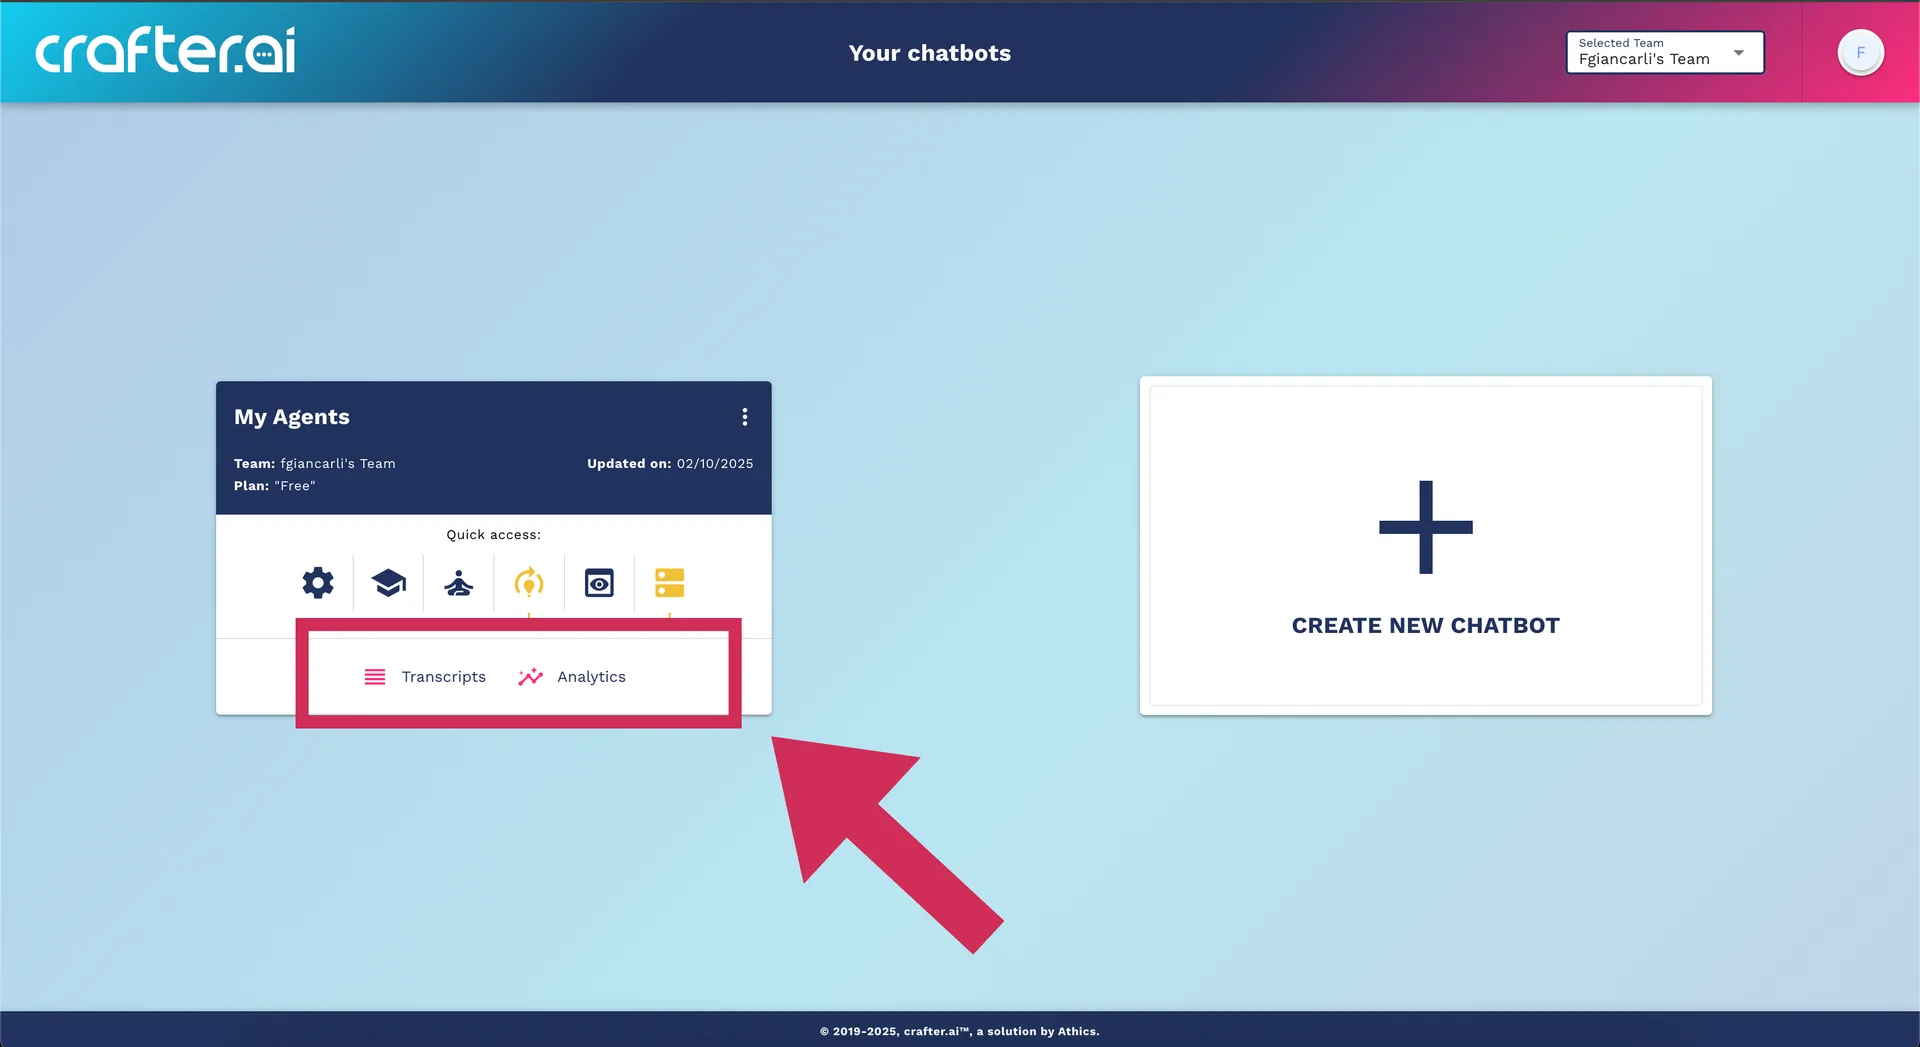
Available Metrics:
- Total Conversations
- Success Rate (resolved conversations)
- Average Session Duration
- Most Asked Questions
- User Satisfaction Score
- Conversion Rate (for lead generation)
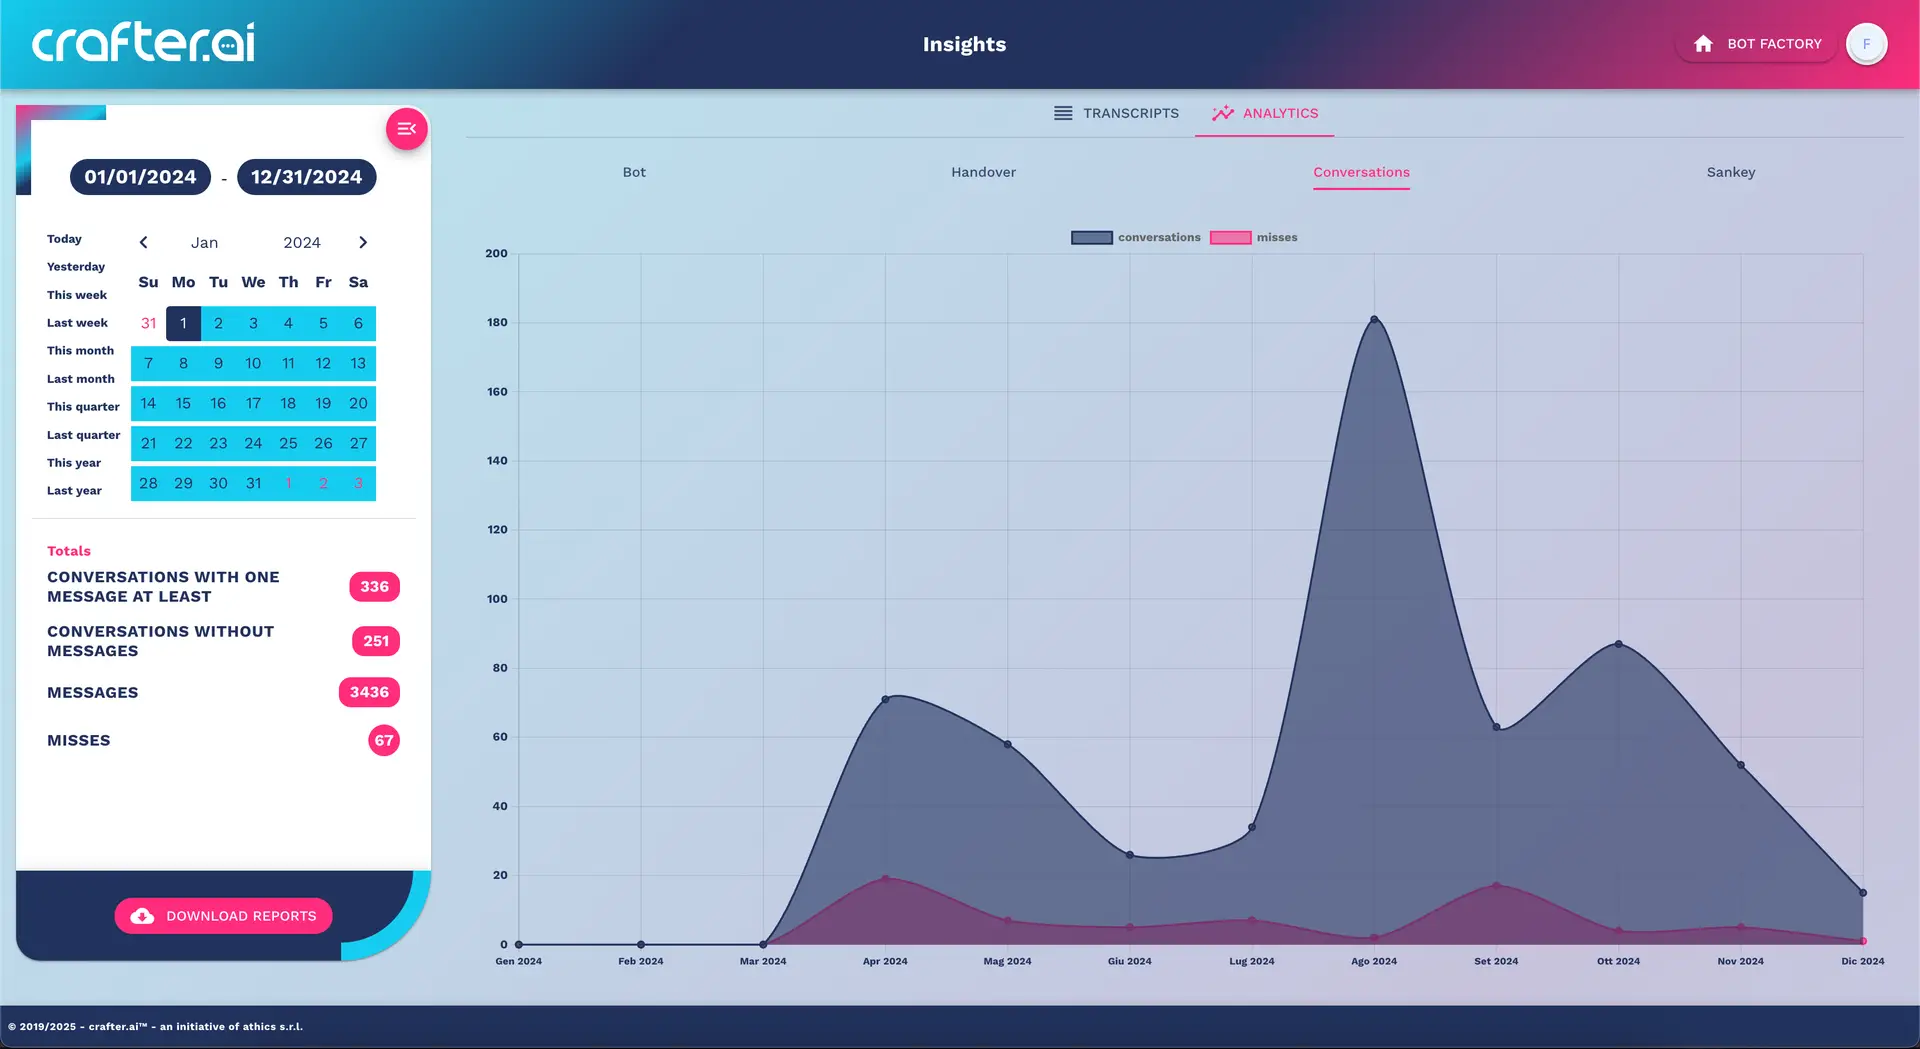
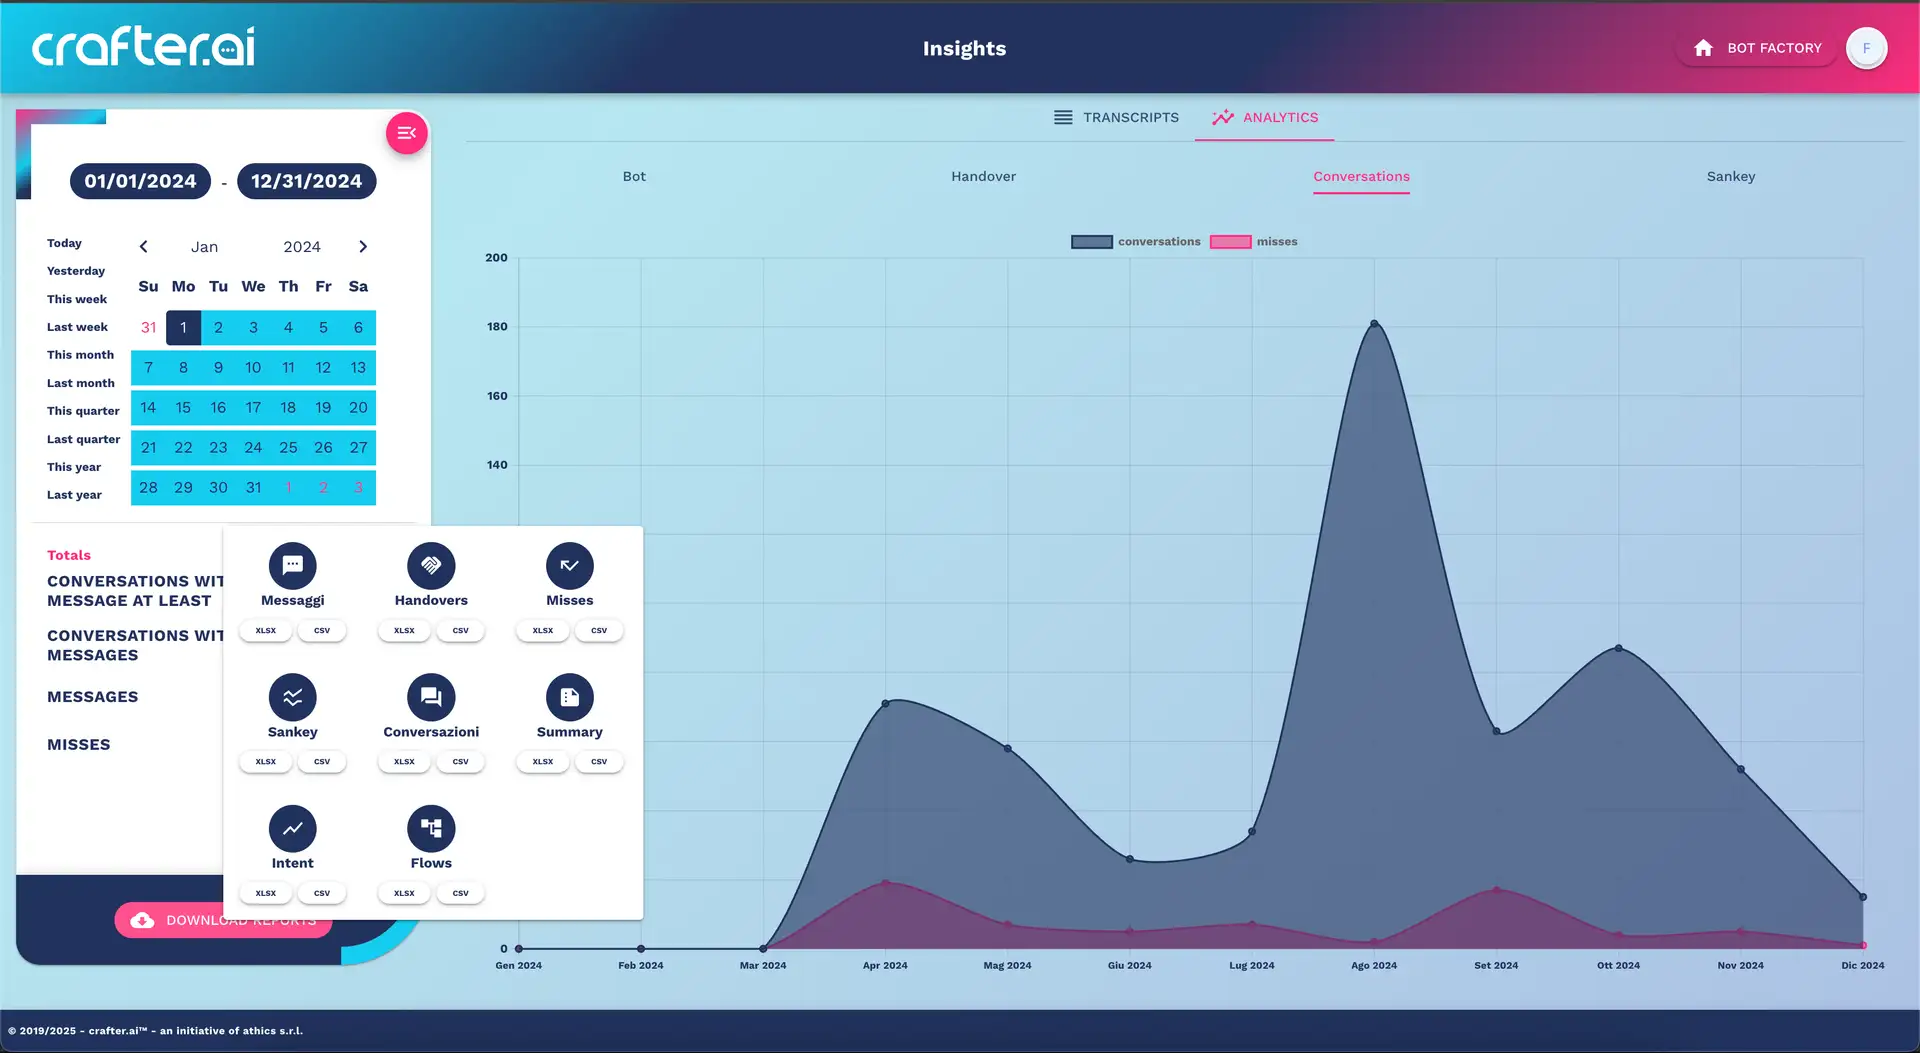
Automatic Reports:
- Daily, weekly, monthly
- Excel/PDF export
- Real-time dashboard
👥 Team Management and Permissions
Available Roles
Owner
- ✅ Full access to everything
- ✅ Billing and plan management
- ✅ Add/remove team members
- ✅ Modify permissions
- ❌ Cannot be removed from the team
Admin
- ✅ Complete chatbot management
- ✅ Configuration and deployment
- ✅ Access to analytics
- ✅ Knowledge base management
- ❌ Cannot modify billing
Adding Team Members
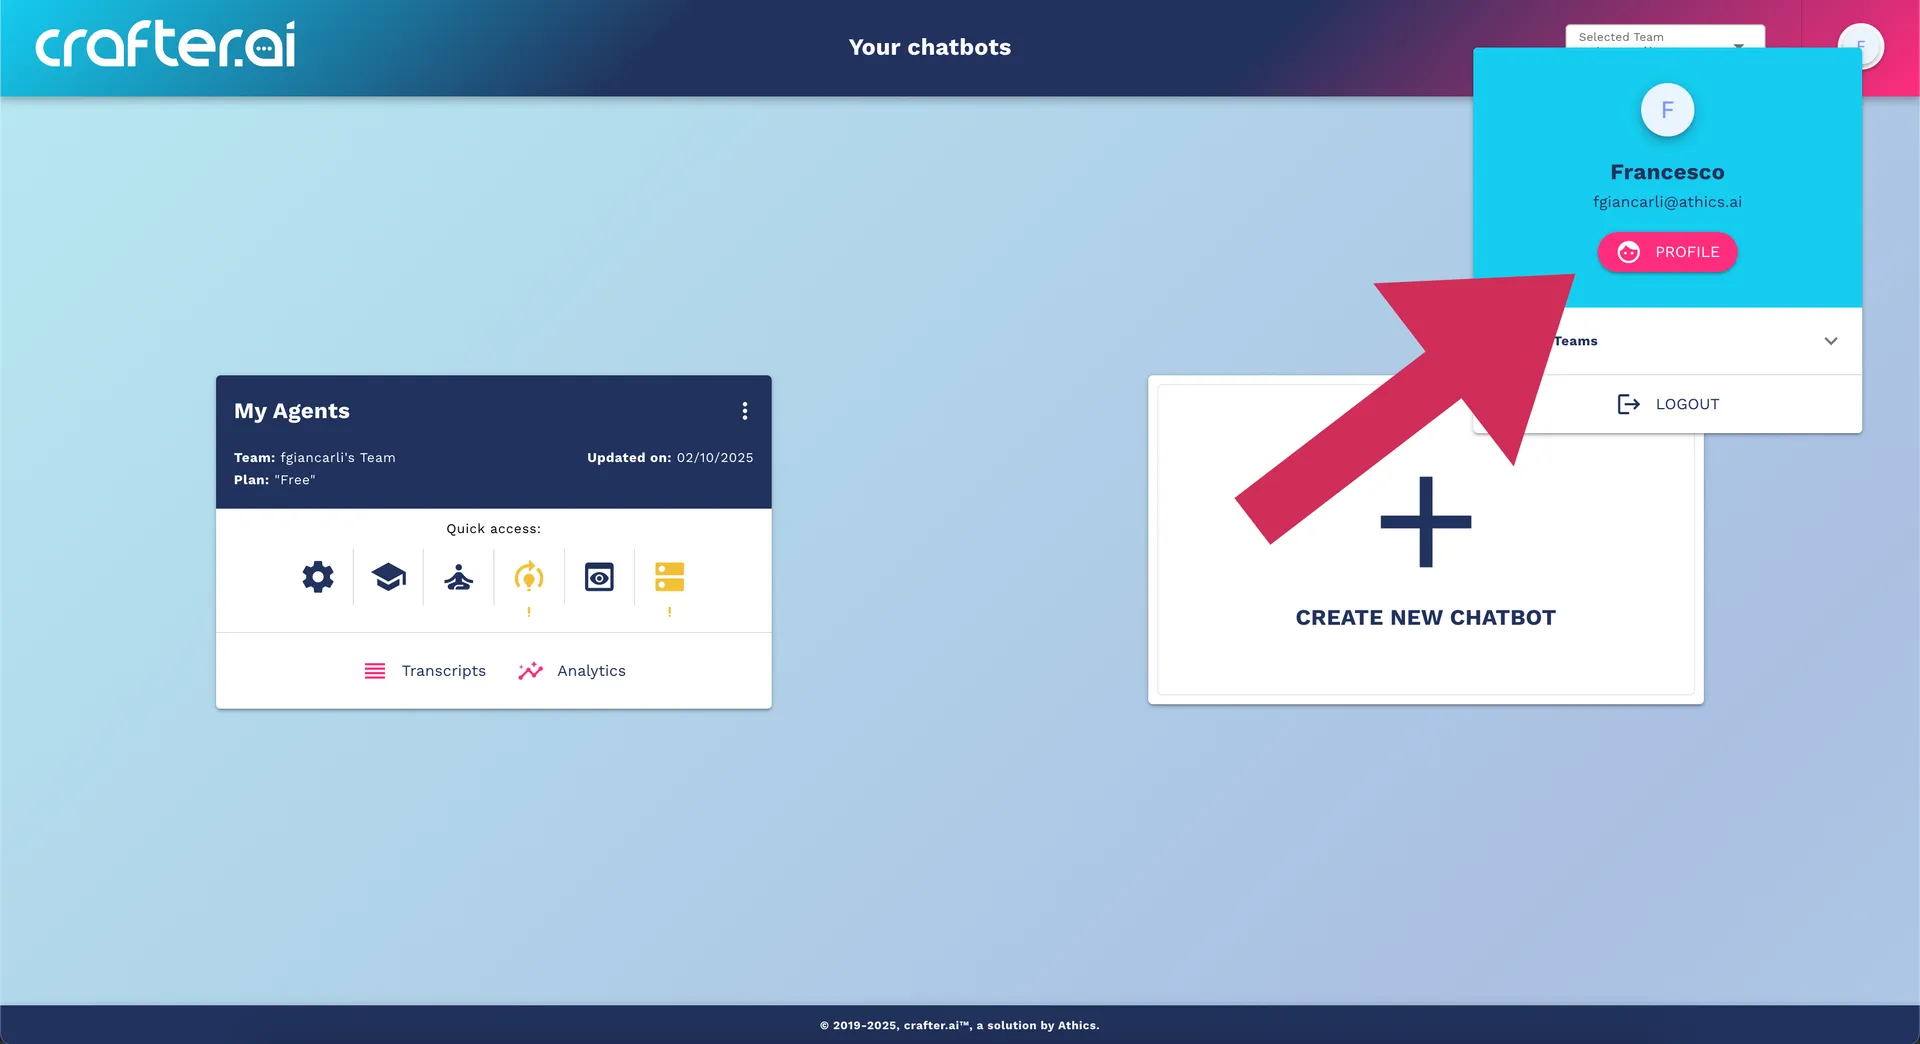
- Go to Team Settings
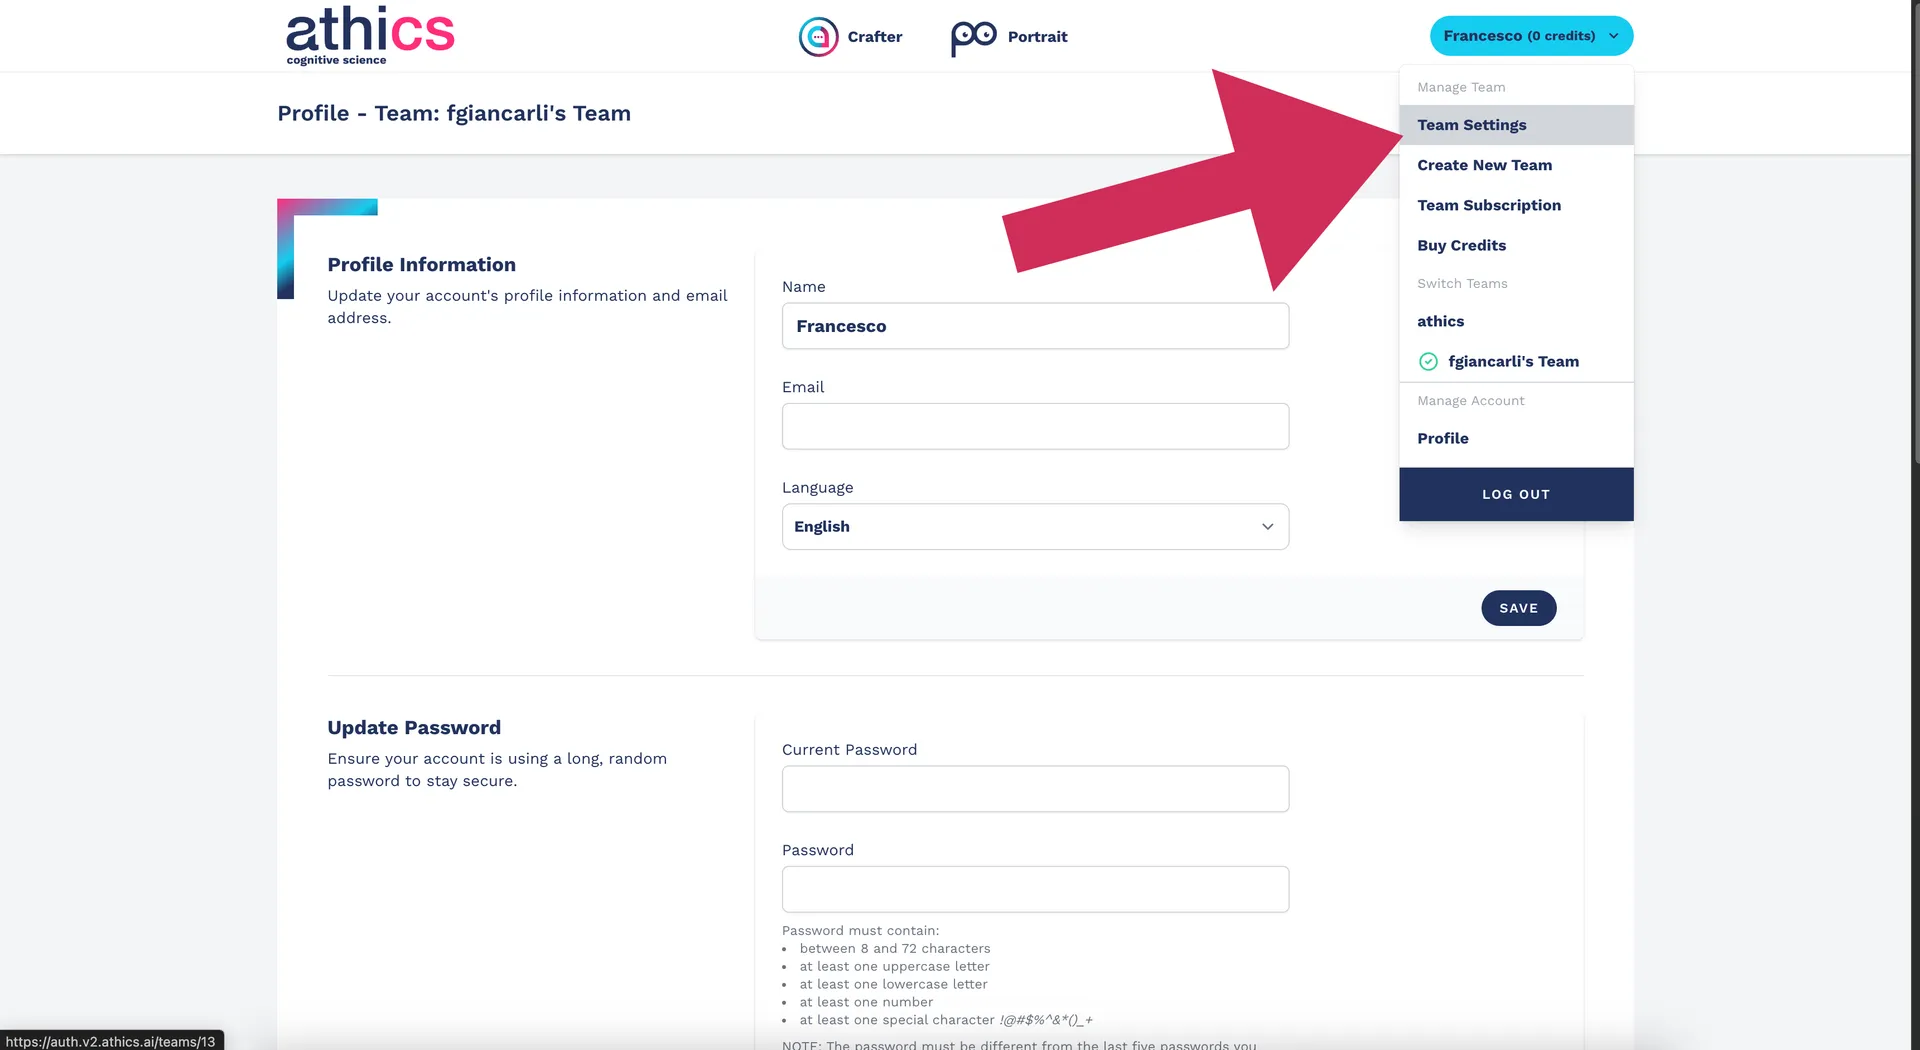
- Click "Invite Member"
- Enter the new member's email
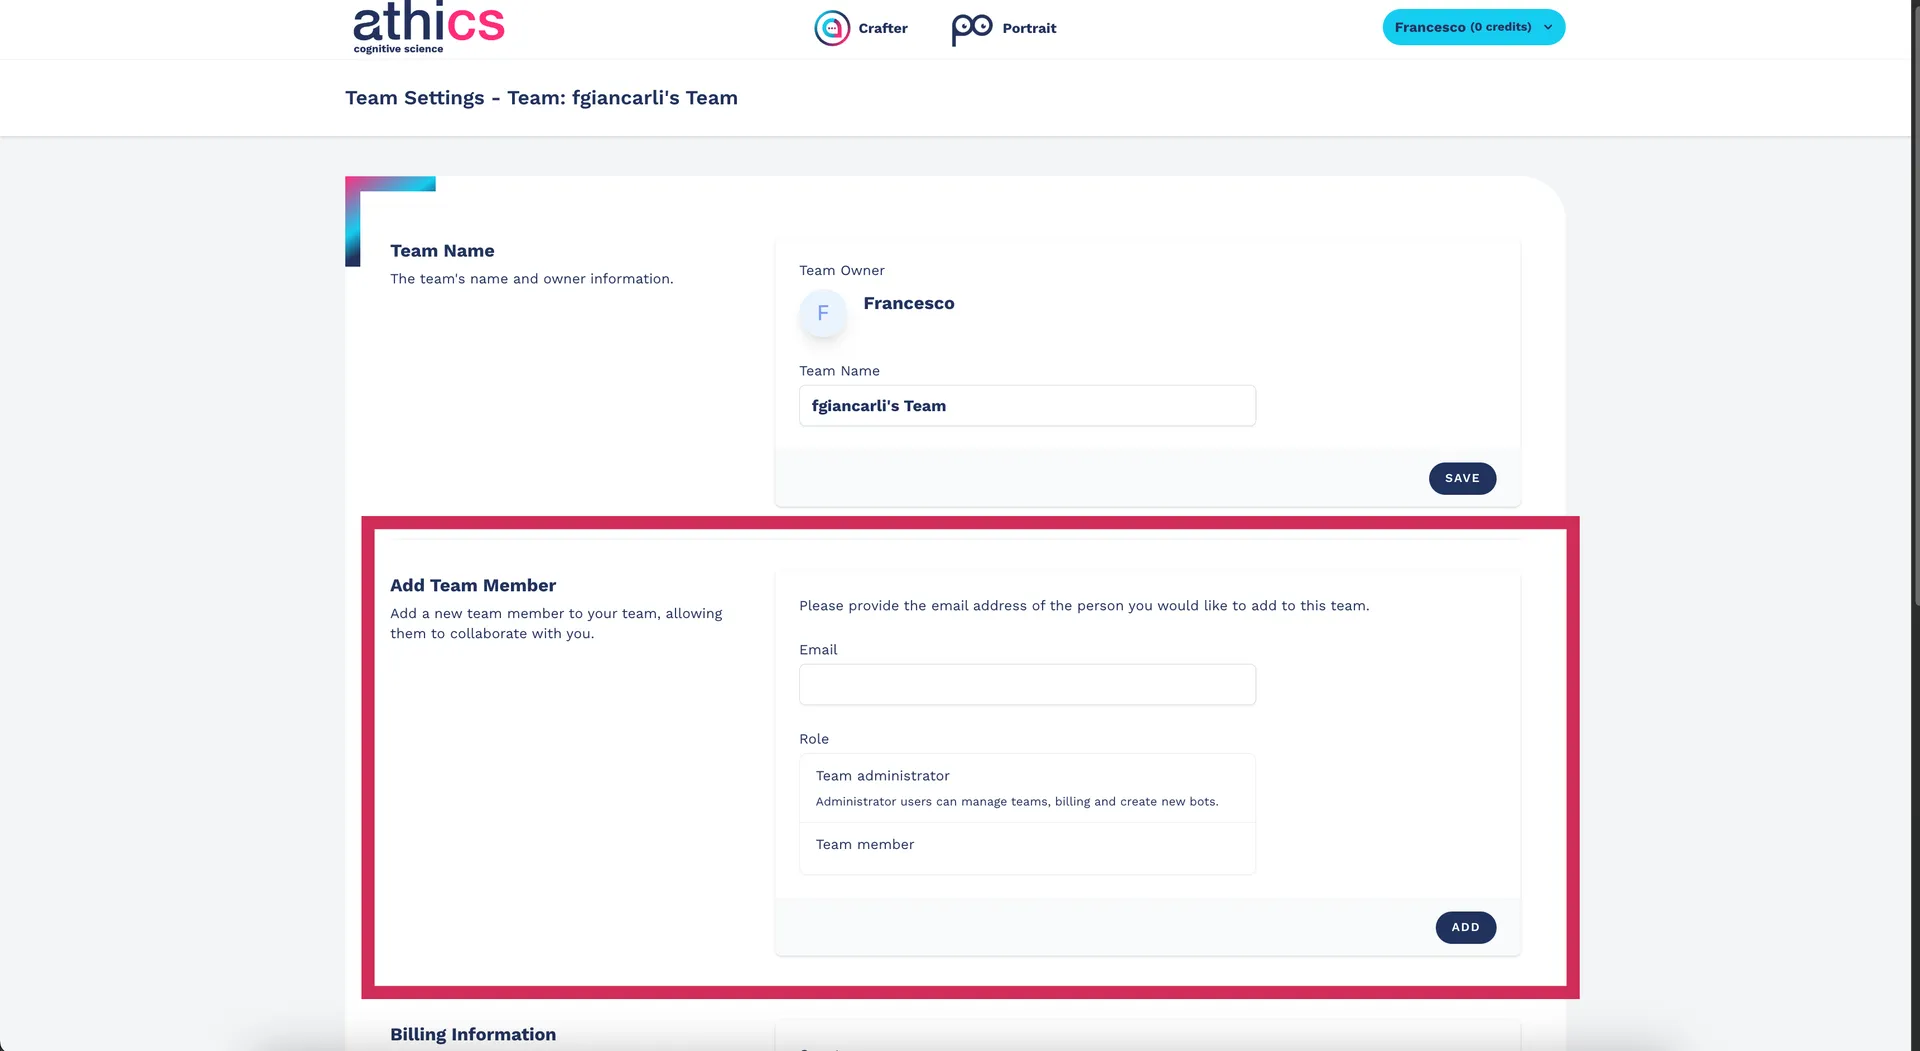
- Select the appropriate role
- Send invitation
The user will receive an invitation email with a link to access the team.
Best Practices for Team Management
- Principle of Least Privilege: Assign only necessary permissions
- Regular Review: Periodically review members and permissions
- Onboarding: Create a clear process for new members
- Backup Admins: Ensure at least 2 admins per team
Technical Requirements
- Browser: Chrome 90+, Firefox 88+, Safari 14+, Edge 90+
- JavaScript: Must be enabled
- Cookies: Required for authentication
- HTTPS: Mandatory for deployment on websites
GDPR Considerations
- Consent: Required for data collection
- Right to be Forgotten: Supported via API
- Data Portability: User data export available
- Privacy by Design: Integrated privacy configurations
🎯 Optimal Configuration Checklist
Basic Configuration
- Clear and brand-friendly chatbot name
- Informative but concise description
- Correct language for target audience
- Appropriate brain for expected volume
Type and Features
- Chatbot type aligned with business objectives
- Necessary modules activated
- Handover configured for complex cases
- Lead collection set up if needed
Team and Security
- Team members added with appropriate roles
- Permissions verified and documented
- Backup admin configured
- Privacy settings compliant with GDPR
Pre-Deploy Testing
- Configurations tested in preview environment
- Main workflows verified
- External integrations validated
- Performance baseline established
🔗 Next Steps
Once the Setup is complete:
- [Proceed to Teaching]
- [Team Collaboration]
- [Integration Options]
💡 Tip: Spend time on the initial configuration. A solid foundation facilitates the entire subsequent process and reduces the need for changes during development.