
Live Chat
User Manual - Actions Executable from the GUI The activities are divided by role: Supervisor and Agent (Operator). --- Supervisor Section Note: the fol...
User Manual
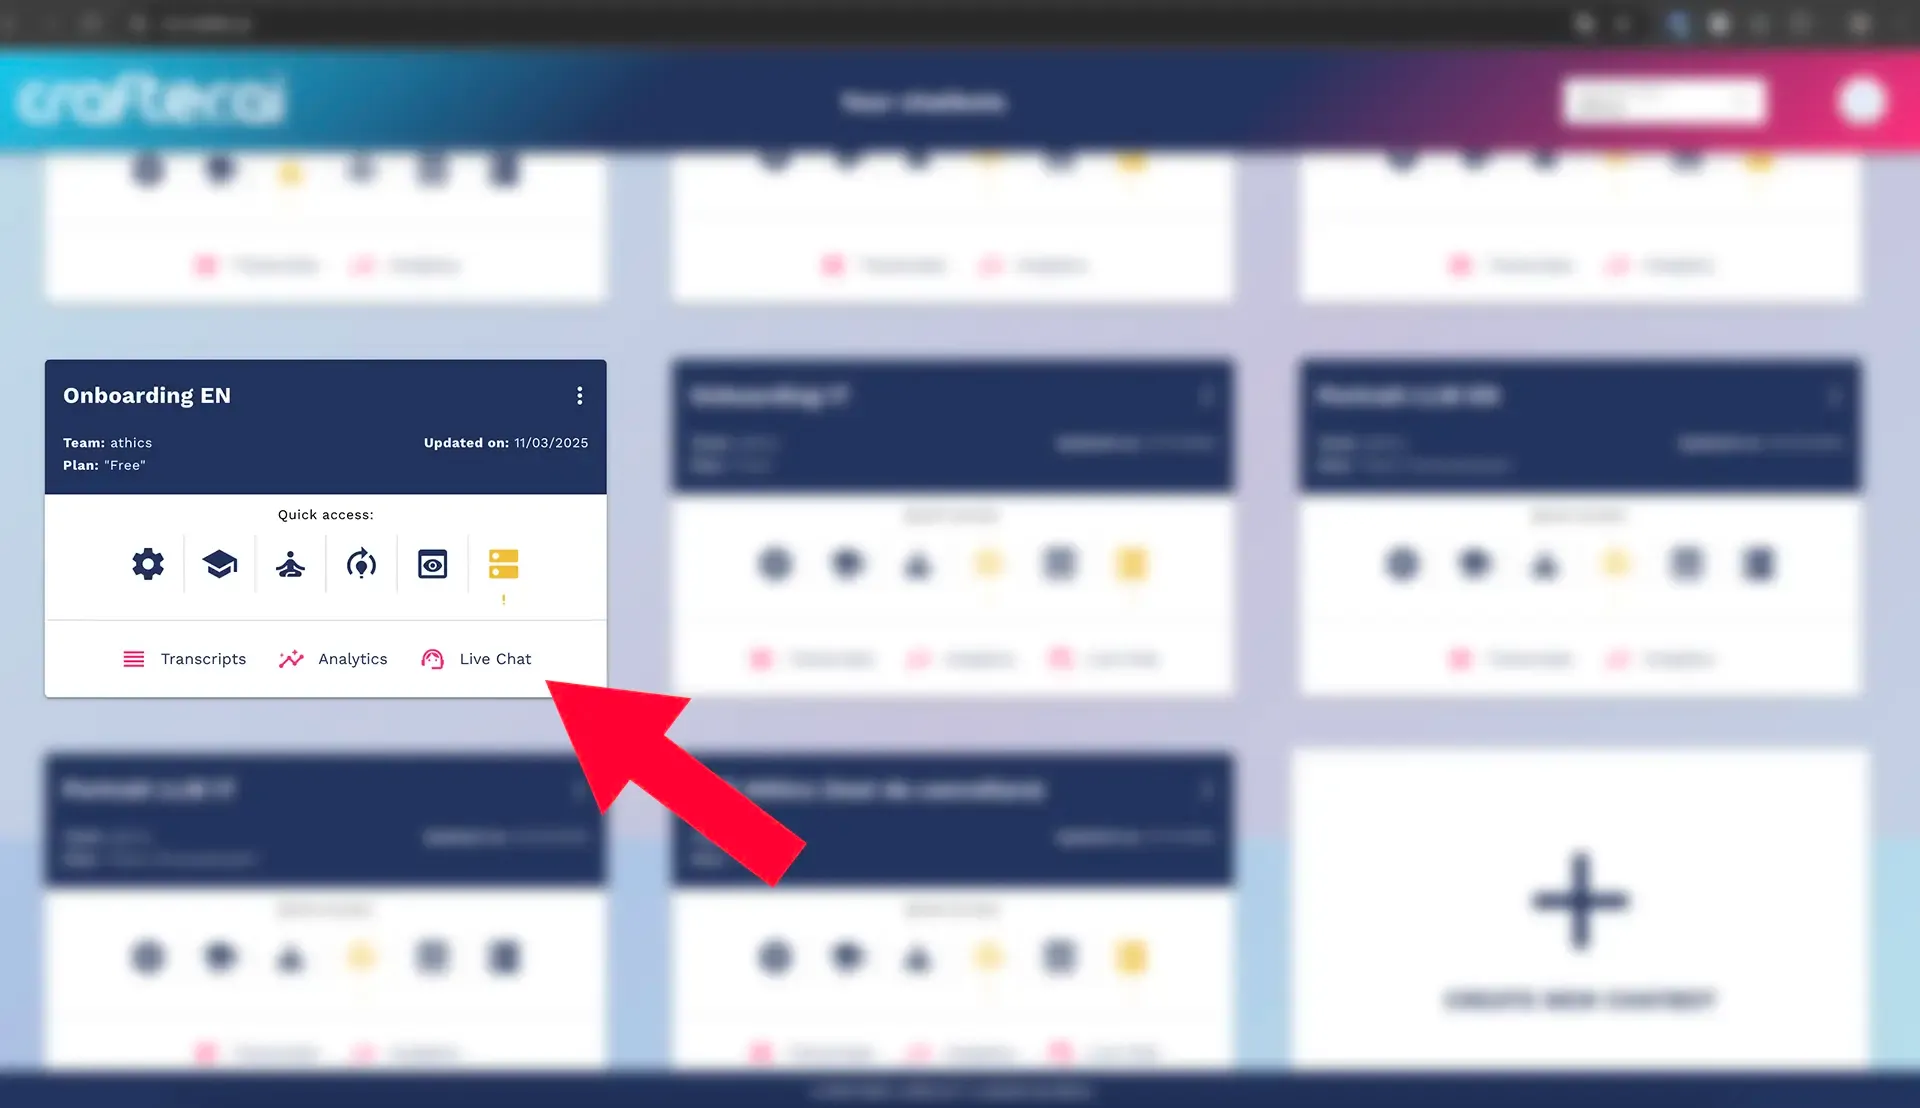
The activities are divided by role: Supervisor and Agent (Operator). Click on "Live Chat" button to start handover.
Supervisor Section
Note: the following operations are available on the Dashboard and administration pages.
View the dashboard with aggregated bot metrics (handover count, leads, etc.).
How to perform: open the "Dashboard" page from the main menu. The initial screen displays widgets and tables with bot metrics. Scroll through the page to view the different panels. Click on a widget for more details or navigate to specific bot views.
Expand the bot tree to see available bots and associated users.
How to perform: in the Dashboard section, go to the bot tree. Click on the bot icon or its label to expand the node; associated users will be displayed. To close the node, click the icon again.
Search for users associated with a bot (search field in the bot section) and navigate the result pages.
How to perform: when you open the user list of a bot, use the search field at the top to enter the name or email. Press Enter or click the search icon. Use the pagination controls (at the bottom) to navigate through the result pages.
Open the user list for a bot (paginated) and view user details.
How to perform: expand the bot in the tree and scroll through the user list that appears. Clicking on a single user will open the details (name, email, role) directly in the view or in a sidebar panel, if available.
Create a new tag (handover tag) for a bot.
How to perform: in the bot section (Dashboard > select bot) find the "Tags" or "Handover Tags" area. Click the "Add tag" button or the + icon, enter the tag name in the text field, and confirm with "Save" or "Add".
Modify an existing tag of the bot.
How to perform: in the bot's tag list, locate the tag to modify and click the edit icon (pencil). Change the text in the field that appears and save the changes with the confirm button.
Delete a tag associated with the bot.
How to perform: in the bot's tag list, click the delete icon (trash can) next to the tag you want to remove. Confirm the action in the confirmation window that appears.
Add a new canned reply to the bot.
How to perform: in the bot's configuration page, find the "Canned Replies" section. Click "Add reply" or the + icon, enter the reply text, and save with "Save" or "Add".
Modify an existing canned reply of the bot.
How to perform: in the list of canned replies, click the edit icon (pencil) on the desired reply. Update the text and click "Save" to apply the changes.
Delete a canned reply of the bot.
How to perform: in the list of canned replies, press the delete icon (trash can) on the reply row and confirm the removal in the confirmation window.
Set or update the limit of the bot.
How to perform: in the bot settings page, find the "Limit" or "Handover limit" field. Enter the new numeric value and save the changes with the "Save" button.
Add new skills to the bot.
How to perform: in the bot's "Skills" section, click "Add skill". Type the skill name in the field and confirm with "Add". The new skill will be listed.
Remove skills from the bot.
How to perform: in the bot's skill list, click the delete icon next to the skill to be removed and confirm the action.
Modify the skills of a single agent related to a bot (add/remove skills from the agent).
How to perform: open the user list of the bot, locate the agent and click to view the details. In the agent's skill section, use the toggles or checkboxes to add/remove skills, then click "Save" to apply.
View users without access to the bot.
How to perform: in the bot access management page, select the "Users without access" view. A list will be displayed with search and pagination options.
Grant access to a user for a bot and select the role (agent or supervisor).
How to perform: in the "Users without access" list, find the desired user and click "Grant access" or "Add". In the window that opens, choose the role (agent or supervisor) and confirm.
Revoke a user's access to a bot.
How to perform: in the bot's user list, click on the user whose access you want to revoke and select the "Remove access" option or the trash can icon. Confirm the action.
Change a user's role for a bot (switch agent ↔ supervisor).
How to perform: in the bot's user list, select the user and choose "Edit role". Select the new role from the dropdown menu (agent or supervisor) and save.
View pending invitations for a team.
How to perform: in the Team > Invitations section or in the specific team view, open the "Pending Invitations" tab to view pending invitations.
Invite a new agent to the team by sending an email.
How to perform: in the team's invitations section, click "Invite new" or "Send invitation", enter the new agent's email, and press "Send". A pending invitation will be created.
Revoke a pending invitation.
How to perform: in the list of pending invitations, locate the invitation and click the revoke icon or "Delete invitation". Confirm to remove the invitation.
Agent (Operator) Section
The following actions can be performed by operators in their workspace (Flip Cards, Chat, User Menu, History).
Flip Cards / Activities
Scroll through active conversations using the swiper (flip cards).
How to perform: in the main view (Flip Cards), use the swipe with the mouse or touchpad or the navigation controls to scroll through the cards of active conversations.
Select/bring a conversation to the foreground by clicking on the corresponding card.
How to perform: click on the card of the conversation you want to manage; the card will be brought to the foreground and the associated chat will open.
If there are no conversations, display the message "no activities".
How to perform: if the activity list is empty, you will see the badge "No activities"; no action is required, wait for new assignments or refresh the app's status.
Chat (viewing and sending messages)
Open the chat of a conversation (from the flip card or the tasks list).
How to perform: click on the corresponding flip card or select the task from the tasks list in the History view; the chat will open in the message panel.
Copy the contact's email from the chat header (copy button).
How to perform: in the chat header, click the copy icon next to the email address; the address will be copied to the system clipboard.
Copy the conversation ID from the chat header (copy button).
How to perform: in the chat header, click the copy icon next to the conversation ID; the ID will be copied to the clipboard.
Scroll through the message list (manual scroll or auto-scroll on load).
How to perform: use the mouse wheel, scrollbar, or touchpad to scroll through the message list. When the chat opens, the view automatically positions itself on the last message.
View the sender, timestamp, and content of messages (Markdown rendering).
How to perform: read the messages in the panel; each message shows the sender and time. The text is automatically rendered in Markdown.
Translate a single message (translate button on each message).
How to perform: click the small translation button present on the edge of the message. If available, the translated text will temporarily replace the original text; clicking again will return to the original. During the operation, a spinner will be shown on the button.
Translate all messages in the conversation with the "Translate all" button (overlay in the top right).
How to perform: in the chat, in the top right, find the "Translate all" button (translate icon). Click it to start translating all messages. The button shows a spinner while the operation is in progress and is disabled until completion.
Enter text in the input area (only in handover-type conversations).
How to perform: at the bottom of the chat, use the input field (textarea) to type the message. The field is disabled for non-handover conversations.
Translate the user's input by pressing the translation button in the input area (when the conversation language is different from the agent's language).
How to perform: if available, click the translation button next to the input to translate the entered text. When the text has been translated, the same button changes icon (for example to "edit"): clicking it will return to editing the original text.
Send the message with the Send button or by pressing Enter.
How to perform: after writing (or translating) the text, send it by clicking the Send button on the right side of the input or pressing Enter. If the button is disabled, check that the field is not empty and that no translation is in progress.
Navigate the message pages through the pagination visible when there are multiple pages.
How to perform: below the message area, if pagination is present, use the pagination controls to change pages. You can click on the numbers or use the forward/backward navigation links.
Handover / Lead Management
Accept a handover (Accept button on the handover or in the conversation UI).
How to perform: find the handover in the activity list or in the flip card. Click the "Accept" button or the corresponding action in the conversation UI. The interface will show a spinner during processing and, upon success, the conversation will be assigned to you.
Release a previously accepted handover (Release button).
How to perform: in the accepted conversation, click "Release" or the release icon in the toolbar; confirm if prompted. The action will return the conversation to the pool.
Accept a lead (dedicated button for leads).
How to perform: in the lead list or in the lead flip card, click "Accept". The action assigns the lead to the operator.
Release a lead (Release button for leads).
How to perform: in the lead view, click the "Release" button to return the lead to the pool.
Search for colleagues to transfer a conversation (search field in the transfer UI).
How to perform: in the transfer/transfer-request screen, open the "Search colleagues" panel. Enter the colleague's name or email in the search field and press Enter or the search icon.
Send a transfer request to a colleague (Transfer request).
How to perform: after finding the colleague, click the "Transfer" or "Request transfer" button next to their name. Confirm sending the request in the dialog window.
Accept a received transfer request.
How to perform: when you receive a transfer request notification, open the request from the notifications panel or the handover list. Click "Accept transfer" to accept the conversation.
Decline a received transfer request.
How to perform: from the same view of the transfer request, click "Decline" or "Reject" to refuse the request.
Mark a lead as managed (button "Mark as managed").
How to perform: in the lead view, click the "Mark as managed" or "Managed" button. The UI will confirm the action and update the lead's status.
Assign a tag to a conversation (select available tags and confirm).
How to perform: in the conversation, find the tag section (usually in the header or sidebar panel). Select one or more tags from the dropdown list or suggested input and press "Apply" or "Save".
Remove a tag from a conversation.
How to perform: in the conversation's tag list, click the removal icon next to the tag you want to delete and confirm the action.
Add or modify a note to the conversation and save it (note field + Save).
How to perform: find the "Note" field in the conversation view or in the sidebar panel. Type the note and click "Save" to associate the note with the conversation.
User Tools and Preferences
Open the user menu (avatar) to view profile information.
How to perform: click the avatar in the top right of the UI to open the user menu. A card will be displayed with name, email, and quick actions.
Enable/disable Backoffice mode (toggle in the user menu).
How to perform: in the user menu, locate the "Backoffice" toggle and switch it ON/OFF. If prompted, the system may show a spinner while changing the mode.
Enable push notifications or request permission from the browser (toggle in the user menu).
How to perform: in the user menu, find the "Notifications" option and activate the toggle. On the first attempt, the browser will ask for permission; accept to enable notifications.
Access the editor for your canned replies (User Canned Replies).
How to perform: in the user menu, open the "Canned Replies" section. The editor will be displayed with the list of personal replies and buttons to add/modify/delete.
Create a new personal quick reply.
How to perform: in the quick replies editor, click "Add" or the + icon, enter the reply text, and save.
Modify an existing personal quick reply.
How to perform: in the list of quick replies, click the edit icon (pencil) of the desired reply, update the text, and press "Save".
Delete a personal quick reply.
How to perform: in the list, click the delete icon (trash can) next to the reply and confirm the deletion.
Open the personal Activity Report (section in the user menu).
How to perform: in the user menu, click "Activity Report" to open the panel or page containing the report of personal activities.
View team memberships (chip) in the user menu.
How to perform: open the user menu; in the profile card, scroll the "Teams" section to see any chips with teams.
Log out via the link in the user menu.
How to perform: open the user menu and click the "Logout" button or the exit link; you will be redirected to the logout page or the configured logout URL.
Notifications and Sounds
Receive system notifications (browser) for events such as new handovers or leads (if permitted).
How to perform: enable notifications from the user menu. When you receive relevant events (handover/lead), the browser will show a system notification; clicking it will return you to the UI.
Play local sounds for events (new handover, new message) automatically.
How to perform: ensure that audio is enabled on the device and that playback has been previously activated (some browsers require user interaction). Sounds will be played automatically upon receiving events.
History
Select the time range (preset: today, yesterday, this week, last month, etc.).
How to perform: on the History page, find the range selector (preset ranges). Click the desired preset to immediately apply the range.
Set a custom range (custom range).
How to perform: in the range selector, click "Custom" or drag the calendar bounds to choose start and end dates, then confirm to apply.
Set filters: free text search, select bot, tag filter.
How to perform: in the filter bar, enter the search string, select the bot from the dropdown menu and/or select available tags. After setting the filters, click "Search" or "Apply".
Start the search/history with the set filters.
How to perform: after setting the filters, click the "Filter" or "Search" button; the task list will update based on the parameters.
Select a conversation from the task list to view its details.
How to perform: in the task list, click on the conversation you are interested in; the details and messages will load in the right panel.
Navigate between pages of the task list (pagination on the left).
How to perform: use the pagination controls below the task list to move to the next or previous pages.
View the messages of the selected conversation (area on the right).
How to perform: after selecting a task, scroll or read the message area on the right; the loaded messages are paginated.
Navigate the pagination of the conversation messages.
How to perform: below the message area, use the pagination bar to change the page of messages.
Download the aggregated report for the selected range (Download Report button).
How to perform: in the Report section or on the History page, after setting the period and the bot, click the "Download Report" button; the file will be downloaded as a blob (e.g., Excel or CSV).
Quick Notes
Many actions make calls to the server and may show a spinner or block controls until the call returns (e.g., translations, accept/release, transfer). The translations of the text-message interface have loading indicators and can be canceled/interrupted by the user by interrupting the request.